Ilkhanid Mongol
| Navigation - HomePage - The Rise of Rome - Storm of Arrows - Immortal Fire - Legions Triumphant - Swords and Scimitars - Eternal Empire - Decline and Fall - Wolves from The Sea - Swifter Than Eagles |
Historical Overview Section
The Ilkhanate was one of the four khanates within the Mongol Empire. It was centered in Persia based, originally, on Genghis Khan's campaigns in the Khwarezmid Empire in 1219-1224, and the continual expansion of Mongol presence under the commands of Chormagan, Baiju, and Eljigidei. The founder of the Ilkhanate dynasty was Hulegu Khan, grandson of Genghis Khan and brother of Mongke khan. Taking over from Baiju in 1255 or 1256, he had been charged with subduing the Muslim kingdoms to the west "as far as the borders of Egypt." This occupation led the Turkmens to move west into Anatolia to escape from the Mongolian tribes.
Hulegu then returned to the Persian heartland and established his dynasty. His expedition towards Egypt, however, was halted in Palestine in 1260 by a major defeat at the Battle of Ain Jalut at the hands of the Mamluk Egyptians. Hulagu's descendants ruled Persia for the next eighty years, beginning as Shamanists, then Buddhists and ultimately converting to Islam. However, the Ilkhans remained opposed to the Mamluk Egyptians (who had defeated both Mongol invaders and both Early Crusaders and the Later Crusaders).
Many attempts were made towards forming a Franco-Mongol alliance between the mid-13th and early 14th centuries, starting around the time of the Seventh Crusade. The Later Crusaders were open to the idea of assistance coming from the East, due to the long-running legend of a mythical Prester John, an Eastern king in a magical kingdom who many believed would arrive someday to help with the fight in the Holy Land. The Mongols and the Franks also shared a common enemy in the Mamluk Egyptian Muslims. The closest thing to actual Later Crusader cooperation with Mongol military actions was the overlord-subject relationship between the Mongols and the Later Crusader Principality of Antioch, and other Christian vassal states such as the included Georgians and Cilician Armenians. Once these countries had submitted they were required to provide military forces to fight under the Ilkhanid banner, and these forces often showed great enthusiasm in attacking Mamluk Egyptian Moslem targets.
In 1260 most of the Syrian States were briefly conquered by the joint efforts of the Mongols and the Cilician Armenians and Later Crusaders of Antioch. However in the same year another Later Crusader state entered into a passive truce with the Mamluk Egyptians and stood aside as the Egyptian forces advanced northwards through Palestine allowing them to secure a major and historic success against the Mongols at 1260's pivotal Battle of Ain Jalut.
The Mongols again invaded Syria several times between 1281 and 1312, and sometimes attempted joint operations with the Europeans but ultimately both the Later Crusader Franks and the Mongols were ejected from Palestine by 1303, leading to the 1323 Mongol-Mamluk Egyptian Treaty of Aleppo which saw the Mongol stranglehold over their vassals the Sultanate of Rum and the Cilician Armenian kingdoms end. This was hastened by the hostility of the khanates to the north and east – the Chagatai Khanate in Moghulistan and the Tatar olden Horde of Berke threatened the Ilkhanate in the Caucasus and Transoxiana, preventing expansion westward. Even under Hülagü's reign, the Ilkhanate was engaged in open warfare in the Caucasus with the Tatar Mongols on the Russian steppes.
After Abu Sa'id's death in 1335, the khanate began to disintegrate rapidly, and split up into several rival successor states, most prominently the Jalayirids. Timur, leader of Timurid part of the Timurid White Sheep Turcoman or Black Sheep Turcomans later carved a state from the Jalayirids, ostensibly to restore the old khanate.
Who are these Mongols anyway then?
The FoG army lists reproduce the Mongols in many guises. They are:
- Mongol Conquest - Empires of the Dragon : 1206-1260, The origin of the Mongols, Ghengis Khan, invading China and Korea.
- Mongol Invasion - Oath of Fealty : 1223-1242, Ghengis invades Russia, his sons invade Bulgaria & Hungary and then turn into the Golden Horde Tatars.
- Tatar - Eternal Empire : 1242-1500, a multi-ethnic conglomeration extracting tribute from Russia, the Baltic, the Crimea and all the 'stans but finally coming unstuck against the Timurids and then the Ottomans.
- Ilkhanid Mongol - Swords and Scimitars : 1230-1353, Mongols (and assimilated Turks, Persians and Cumans) in Iran, Azerbajan, Iraq messing with the Crusaders, Caliphates and Caucauses. Has some Frankish knights for added interest.
- Timurid White Sheep Turcoman or Black Sheep Turcoman - Eternal Empire ; 1360-1500, Tamerlane, almost restoring Ghengis' glory days from China to Europe, 4 elephants, some bowmen on foot.
- Later Horse Nomad - Empires of the Dragon : proto-Mongols
- Yuan Chinese - Empires of the Dragon : Sedentary Mongols in China.
Using the army in FoG
You may want to review the Troop Types in FoG shooty cavalry page of the FoG tactical guide methinks...
- Like other shooty cavalry armies, your battle plan is usually to stake out as much ground as possible to block enemy Second Moves, at least in some sectors, and leave ample manoeuvre room behind your lines. Getting first move is very helpful so losing the PBI roll is preferred by some players, although your tough Cv may be willing to face the enemy in close combat, so its therefore less critical to keep lots of manoeuvre room to the rear.
- You also can't choose Steppe terrain so that helps to decide to not take an IC and lose the initiative roll.
- Agricultural is not too bad for any Mongols, as you can use Open Fields instead of Opens. In open Fields your LH still move fast but your cavalry are on evens against lancers.
- Without an IC consider taking all the LH as superior so you can enter into a shooting match with confidence
- Only three Generals is probably OK since this will be a small army in BG numbers. Also you should not plan to fight with any troops until you are at a big advantage, so less need for generals to tip he balance in evens combats.
- The knights are tempting, but sort of defeat the object of the rest of the army. If you do have them, keep them as a reserve rather than leading with them. Against Knight armies you will be outnumbered by enemy Knights anyway so ....
- Textbook stuff is to deploy the Cavalry on the flanks to bully other lights, and your own lights in the middle to decline combat
- Sometimes you are lucky and the enemy deploys with a hanging flank you can readily outwing and envelop, or a good flank march opportunity presents itself, but often the terrain and enemy dispositions limit you to a frontal approach of disrupting, loosening and disjointing the enemy line of battle with shooting, threats, and uncontrolled enemy charges in order to expose gaps, flanks and other weak spots you then exploit with concentrated shooting or timely charges
- Destroy or flee enemy Skirmishers, draw their mounted and aggressive foot away from their other troops by skirmishing - he will have to charge shooters to reduce their effect - pick off isolated detachments, and provoke charges where possible. Work around his flank and hunt his BG count filler such as Mobs and LF.
- Ultimately your cavalry will need to be the ones to win the battle for you by running down your opponents - remember this and don;t expect your LH to do all the work in eroding enemy morale and competence to breaking point.
- One common mistake with all Shooty cavalry is to take advantage of the possibility evade too often - superior armoured cavalry swordsmen are still very potent combat troops against most enemies, and it is often better to advance in 2 ranks (inflicting more shooting as a result) and take on any enemies in hand to hand combat.
- The time to commit is once an enemy has gone disrupted, or if they have lost bases - waiting and skirmishing in the hope they go fragmented may well be gilding the lilly.
- The Crusader knights are cool, and have great staying power but are slow, and might distract you from the main reason to use the army. See them as an anvil to occupy the enemy whilst you work the flanks, not as a hammer to win the game alone.
- Superior (un)protected drilled cavalry are not too bad when combined with other LH on a flank - they will outmatch standard LH who might otherwise risk standing up to your expensive Superior LH - and may catch them when they evade. They are just as good as armoured cavalry against Heavily Armoured knights as well.
- The unique option with this list is cavalry and light horse adding one or more superior heavily armoured knight units. The Ilkanids get a handy unit of proper knights, plus they can take a 'knight plus filler' Armenian ally. You could even take a Mongol cavalry unit as unprotected superior as rear support. This gets you around one of the problems with the Cv/LH only outfits: people can press you back with a well constructed line of medium weight troops - enough generals and rear support to shrug off shooting, enough strength to make a cavalry charge a big risk. The "proper knights will batter through a medium weight line in the blink of an eye. So your opponent now has a difficulty: close up to face the knights and get your flanks killed or spread out and risk a frontal break through.
- Arguably the BG of Knights slows you up and uses lots of points when what you want is more shooting and more superior shooting. The other downer with this army is no Steppes, as playing the Mongols with tactics of "move and shoot" is the way to get around the back of the enemy ... which you can do more easily on the steppes
- The Ilkhanids can get both Kurdish lancers and Hospitallers, making them one of the most powerful Mongol options. The drilled Hospitallers can get to the weak point in the enemy line and smash through....all the while your opponent is worried about getting pincushioned to death.
- By using several LH BGs, you run those up the middle and slow down the enemy's (hopefully) less maneuverable units. With the flanks unprotected, you should overload a flank with your cavalry and light horse. Try to swing your LH around the flanks and rear of a single anchor.
- I've seen my buddies drop no less than 9-10 dice onto a single BG. For most BGs, you are hitting on 4s and should get 4-5 hits easily (especially with your re-rolls). That means, every time you can pull that off, your opponent will have to test with a -1 or -2 and take a deathroll! No, you don't win quickly, but it is hard to lose too.
- One of my frequent opponents complained that an army like the Mongol Conquest have too many superior and not enough dice. You end up taking too long and running out of time to win. To offset that, he prefers to use the LH to disrupt an opponent and then charges in with a slightly less expensive, Superior, Armoured Lancer Cavalry. You end up busting through that anchor more quickly and can then ,rapidly, take advantage of the failed battleline. This (of course) means that you have to find a different steppe army (perhaps the Huns?)...
UK Tournament Results with this army
7 / 27 Ilkhanid Mongol Britcon 2007 15mm (open)
10 / 62 Ilkhanid Mongol Britcon 2008 15mm (open)
26 / 62 Ilkhanid Mongol Britcon 2008 15mm (open)
46 / 62 Ilkhanid Mongol Britcon 2008 15mm (open)
Useful Links
User-contributed links about this army:
- Wikipedia the Ilkhanid homepage
- The Steppe History Discussion Forum You'll always find something useful on here about this army
- Mongol Blog site with Old Gory 15mm figures on it
- Manuchehr enthroned with Rostam in attendance
- Musa Slays the Giant 'Uj ibn 'Anaq
- Lohrasp enthroned with scribes in attendance
- Dying Rostam shoots Shaghad
- Eskandar enters the Land of Darkness
- Mahmud of Ghazni in robe from the Caliph
- Mahmud of Ghazni crosses the Ganges
- Besieged defenders of a town advancing to battle
- Battle Between Abu'l-Qasim and the Samanid Muntasir
- Muntasir Crossing the Jayhun
- Mongols besieging a City
- Kublai Khan on an elephant
- Battle of the Pandavas and the Kauravas, a scene from the Indian epic, the Mahabharata
- Execution of Jalal-al-Din Firuzshah II (r1290-96), the Khalji, sultan of Delhi, by his rebellious nephew
- Nobles of Kashmir enthrone a fakir as King Yashaskara
- Ravan, king of Lanka and king of the demons, lies dead before Rama, a scene from the Indian epic, the Ramayana
- Mongol soldiers
Illustrations of Ilkhanid Mongols in the Kitab-i Samak 'Ayyar (part 3), c.1330
- Samak Ayyar folio 003a Soldiers attacking a man lying outside a castle
- Samak Ayyar folio 013b Farrukhruz weeping at the sight of Gulru
- Samak Ayyar folio 019b A man and woman riding camels
- Samak Ayyar folio 031b The King of Chin's men trying to capture Samak, Mah Pari and her maidservant
- Samak Ayyar folio 039b Battle between Jamshid and Khurshidshah
- Samak Ayyar folio 046a Samak in disguise dancing before the king and queen
- Samak Ayyar folio 053a Deathbed scene of Khurshidshah surrounded by courtiers
- Samak Ayyar folio 061a Battle scene
- Samak Ayyar folio 068b Battle scene
- Samak Ayyar folio 080b Capture of a man in a tent, with soldiers attending outside
- Samak Ayyar folio 089a Qatus and Khurshidshah in single combat
- Samak Ayyar folio 094b Farrukhrus and Shirwan-bashan brought captive before Gharib Shah.
- Samak Ayyar folio 106a Farrukhrus rescued from Gharib by Samak
- Samak Ayyar folio 114a Samak's stratagem: a blacksmith heating tongs while a prisoner is held bound on the floor
- Samak Ayyar folio 121a Battle between Farrukhruz and Mardan-dukht
- Samak Ayyar folio 134a Searching for Mardandukht, Samak finds two human-headed birds
- Samak Ayyar folio 140a Marriage of Farrukhruz to Gulbuy, Shirwanbashan, Giti Numay, and Jakalmah
- Samak Ayyar folio 148a Samak captive before Qabut Bari
- Samak Ayyar folio 159a Khurshidshah and Mah Pari (?) emerging from the city gate
- Samak Ayyar folio 166b Two men swimming in a river while angels converse on the bank
- Samak Ayyar folio 180b Two archers shooting an ox while four angels look on from above
- Samak Ayyar folio 189a Bahlan brought captive before Samak
- Samak Ayyar folio 191b Mourners before the head of Khurshidshah
- Samak Ayyar folio 201a The marriage of Mardan-dukht
- Samak Ayyar folio 221b An old woman denounces a captive
- Samak Ayyar folio 226a The Wazir reading a document to Farrukhruz
- Samak Ayyar folio 234b Battle scene
- Samak Ayyar folio 241a Battle of Mardan-dukht and her veiled women warriors against Qabus
- Samak Ayyar folio 251a Captive flogged before Qabus, who is addressed angrily by Mardan-dukht
- Samak Ayyar folio 261a Battle scene
- Samak Ayyar folio 268b Samak conversing with Mahus on a throne placed beside a river
- Samak Ayyar folio 276a Battle between Mardan-dukht and Lal
- Samak Ayyar folio 283b Taj-dukht killing Gulbuy, Shirwan-bashan, Giti Numay, and Jakalmah
- Samak Ayyar folio 288a Taj-dukht captive and hanged in chains
- Samak Ayyar folio 302a Crushing of the witch Tighu under a rock
- Samak Ayyar folio 311a Battle scene
- Samak Ayyar folio 321b Meeting of two kings under a tree, with princess
- Samak Ayyar folio 327b Two men finding a man in a tent decapitated
- Samak Ayyar folio 331a Women offer food and drinks to hairy man
- Hunt in the mountains
- A Ruler Enthroned
- Zal joins Mihrab in battling the Turanians *
- Zahhak and Farshidward before Afrasiyab
- Rustam Lifts Afrasiyab from the Saddle
- Iranian and Turanian Armies in Combat
- Rustam Pleads for Tus Before Kay Khusrau
- Rustam returning to Iran after killing the Div Akvan
- Bizhan Slaughters the Wild Boars of Irman
- Rustam Rescues Bijan from the Well
- Rustam confronting the Turanian Pilsam
- Nastihan Slain by Bijan
- Two of the Duels between the Twelve Rukhs *
- Shida Son of Afrasiyab Slain by Kay Khusraw
- Kay Khusraw crossing the sea
- Execution of Afrasiyab
- The Paladins of Kay Khusrau Perish in a Snowstorm *
- Story of Luhrasp
- Rustam Discoursing with Isfandiyar
- Rustum Fighting with Isfandiyar
- Yazdgird Shahriyar Enthroned
- Bahram Gur in a peasant house
- Bahram Gur Slays a Dragon in India
- The Sasanian King Yazdigird Killed by a Kick from a Horse
- King Khusraw Anushirvan Enthroned
Allies
- Syrian States : Dates: Any Swords and Scimitars page 29 : Compulsary Bw/Sw cavalry, optional cavalry and LH lancers, more Bw/Sw - and some cheap foot units. Worth looking at
- Georgian Any Swords and Scimitars page 16 Lancers pre 1118, Bw/Sw afterwards plus 4 LH make the only minimums in this textbook ally. Foot in cheap 4-strong units is also nice
- Turk, Seljuk - Sultanate of Rum Any Swords and Scimitars page 18 Bw/Sw Superior Armoured Cavalry, and Bw/Sw LH or Protected Cavalry to support - fairly standard Arab ally
- Armenian, Cilician Any Swords and Scimitars page 27 Cavalry, Armoured Knight or Hvy Knight lancers (pre 1100, 1100+ and post 1150) with 2 units of take-it-or-leave it infantry to boost break points
15mm Manufacturers supplying figures for this army
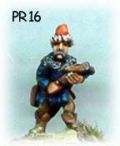
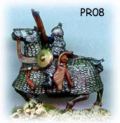
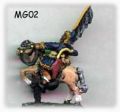
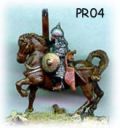
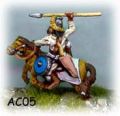
You can see some of the figures in the Ancients Photo Gallery also on this site. The Mongols had many subject troops, so look at the other Arab and East European ranges as well.
|
|
|
|
|
- Essex Miniatures Ilkhanid Mongols in their Crusades range, 9 Mongols in their ancients range
- Donnington 30+ Mongol figures
- Gladiator Miniatures by Fighting 15's (Gladiator Games) 5 Ilkhanids in their Crusades range
- Old Glory 9 Mongols
- Museum Many Mongol and other figures
- Irregular Minis 13 Mongols in their Asian and Turk ranges
- Lancashire Games 5 Mongols in their Ancients ranges, some tatas in their Renaisance range
- Isarus (more former TTG figures) 19 Mongols
- Viking Forge Mongol range with 5 figures
- Brian Hall’s Hall of Ancient Warriors 6 Mongols
- Battle Line (NZ) former TTG Ranges, as above
- Outpost - Central Asian Turk range
- Khurasan - Many Central Asian types
- Legio heroica Turcomans in their Crusades Arab ranges, and a new Mongol range too
- Naismith & Roundway Turcomen in their Persian range
- SHQ Miniatures/Kennington Yuan, Ming & Mongols
- Legio Heroica new range (as of 2010) of Mongol cavalry
- Fire & Sword System Crimean Tatars and Cossacks
- Alain Touller Alain Touller, who sadly passed away in 2014. The ranges are no longer available, but included true 15mm figures from France - lots of variety in their "Peuples des steppes" range
Core Troops
Which troops are absolutely needed for this army, and what are your thoughts on how to organise, paint and buy them.
Army Lists
Sample army lists for this army
Sample 800 AP list
- 1 Turcomans LH unprotected Average Undrilled bow - Swordsmen - 4
- 2 Turcomans LH unprotected Average Undrilled bow - Swordsmen - 4
- 3 Other Mongol Cavalry - LH LH unprotected Average Drilled bow - Swordsmen - 4
- 4 Other Mongol Cavalry - LH LH unprotected Average Drilled bow - Swordsmen - 4
- 5 Other Mongol Cavalry - Cv Cv Protected Average Drilled bow - Swordsmen - 4
- 6 Kurdish Archers LF unprotected Average Undrilled bow - - - 4
- 7 Mongol Cavalry Cv armoured superior Drilled bow Swordsmen - 4
- 8 Mongol Cavalry Cv armoured superior Drilled bow Swordsmen - 4
- 9 Mongol Cavalry Cv armoured superior Drilled bow Swordsmen - 4
- 10 Mongol Cavalry Cv armoured superior Drilled bow Swordsmen - 4
- 11 Other Mongol Cavalry - Cv Cv unprotected superior Drilled bow - Swordsmen - 4
- 12 Kurdish Cavalry Cv armoured superior Undrilled - lancers Swordsmen - 4
- Generals TC - - - - - - - 2
- CinC IC - - - - - - CinC 1
Remember to leave a line before you copy the above section as a template for your own list
eBay Listings
UK Bookstore
