Historical Overview Section
The initial Mongol invasion was of the lands of the Rus and opened with the Battle of the Kalka River in 1223 between the Mongolian generals Subutai and Jebe's troops and the combined force of several Rus' princes. After fifteen years of peace, it was followed by Batu Khan's full-scale invasion during 1237 to 1240. The vast Mongol hordes of around 35,000 mounted archers, commanded by Batu Khan and Subutai, crossed the Volga River and invaded the Later Bulgarian Volga Bulgaria in the autumn of 1236. It took them a year to extinguish the resistance of the Volga Bulgarians, the Kypchaks and the Alani.
In November 1237, Batu Khan sent his envoys to the court of Early Russian Grand Prince Yuri II of Vladimir and demanded his submission. A month later, the hordes besieged Ryazan. After six days of bloody battle, the city was totally annihilated. Alarmed by the news, Yuri II sent his sons to detain the invaders, but they were soundly defeated. Having burnt down Kolomna and Moscow, the horde laid siege to Vladimir on February 4, 1238. Three days later, the capital of Vladimir-Suzdal was taken and burnt to the ground. The royal family perished in the fire, while the Grand Prince hastily retreated northward. Crossing the Volga, he mustered a new army, which was totally exterminated by the Mongols in the Battle of the Sit River on March 4. Thereafter Batu Khan divided his army into smaller units, which ransacked fourteen cities of modern-day Russia.
In the winter of 1239 Batu stormed Rus Kiev in December 1240. The Mongols then resolved to "reach the ultimate sea", where they could proceed no further, and invaded Central Europe with three armies. One army defeated an alliance which included forces from the fragmented Early Polish forces and members of various Christian military orders in the battle of Legnica. A second army crossed the Carpathian mountains and a third followed the Danube. The armies re-grouped and met the ((Ear;y Hungarian))s at the Battle of Mohi in April 1241.
The 60,000 strong Hungarian army was made up of individual knights without tactical knowledge, discipline, or talented expert commanders. As much as the Hungarian army was not expert in dealing with the Mongols style of nomadic warfare, Hungarian King Béla welcomed the Cuman king Kuthen and his men, however a rumor began to circulate in Hungary that the Cumans were the agents of the Mongols. When some hot-headed Hungarians attacked the Cuman camp and killed their king, the Cumans escaped to the south, looting, ravaging the countryside, and slaughtering the surprised Magyar population. The Hungarians faced the Mongol Invasion alone and were utterly defeated at the Battle of Mohi on April 11th.
The Mongol armies then swept across the Early Hungarian over the summer and in the spring of 1242, regained impetus and extended their control into Austria and Dalmatia and Great Moravian lands. The Mongols pursued the Early Hungarian King to Croatia, which they then also trashed. But the Great Khan had, however, died in December, 1241, and on hearing the news, all the "Princes of the Blood" (of Genghis Khan) went back to Mongolia to elect the new Khan!
Who are these Mongols anyway then?
The FoG army lists reproduce the Mongols in many guises. They are:
- Mongol Conquest - Empires of the Dragon : 1206-1260, The origin of the Mongols, Ghengis Khan, invading China and Korea.
- Mongol Invasion - Oath of Fealty : 1223-1242, Ghengis invades Russia, his sons invade Bulgaria & Hungary and then turn into the Golden Horde Tatars.
- Tatar - Eternal Empire : 1242-1500, a multi-ethnic conglomeration extracting tribute from Russia, the Baltic, the Crimea and all the 'stans but finally coming unstuck against the Timurids and then the Ottomans.
- Ilkhanid Mongol - Swords and Scimitars : 1230-1353, Mongols (and assimilated Turks, Persians and Cumans) in Iran, Azerbajan, Iraq messing with the Crusaders, Caliphates and Caucauses. Has some Frankish knights for added interest.
- Timurid White Sheep Turcoman or Black Sheep Turcoman - Eternal Empire ; 1360-1500, Tamerlane, almost restoring Ghengis' glory days from China to Europe, 4 elephants, some bowmen on foot.
- Later Horse Nomad - Empires of the Dragon : proto-Mongols
- Yuan Chinese - Empires of the Dragon : Sedentary Mongols in China.
Using the army in FoG
- Like other shooty cavalry armies, your battle plan is usually to stake out as much ground as possible to block enemy Second Moves, at least in some sectors, and leave ample manoeuvre room behind your lines. Getting first move is very helpful so losing the PBI roll is preferred by some players, although your tough Cv may be willing to face the enemy in close combat, so its therefore less critical to keep lots of manoeuvre room to the rear.
- Sometimes you are lucky and the enemy deploys with a hanging flank you can readily outwing and envelop, or a good flank march opportunity presents itself, but often the terrain and enemy dispositions limit you to a frontal approach of disrupting, loosening and disjointing the enemy line of battle with shooting, threats, and uncontrolled enemy charges in order to expose gaps, flanks and other weak spots you then exploit with concentrated shooting or timely charges
- Destroy or flee enemy Skirmishers, draw their mounted and aggressive foot away from their other troops by skirmishing - he will have to charge shooters to reduce their effect - pick off isolated detachments, and provoke charges where possible. Work around his flank and hunt his BG count filler such as Mobs and LF.
- Ultimately your cavalry will need to be the ones to win the battle for you by running down your opponents - remember this and don;t expect your LH to do all the work in eroding enemy morale and competence to breaking point.
- One common mistake with all Shooty cavalry is to take advantage of the possibility evade too often - superior armoured cavalry swordsmen are still very potent combat troops against most enemies, and it is often better to advance in 2 ranks (inflicting more shooting as a result) and take on any enemies in hand to hand combat.
- The time to commit is once an enemy has gone disrupted, or if they have lost bases - waiting and skirmishing in the hope they go fragmented may well be gilding the lilly.
- By using several LH BGs, you run those up the middle and slow down the enemy's (hopefully) less maneuverable units. With the flanks unprotected, you should overload a flank with your cavalry and light horse. Try to swing your LH around the flanks and rear of a single anchor.
- I've seen my buddies drop no less than 9-10 dice onto a single BG. For most BGs, you are hitting on 4s and should get 4-5 hits easily (especially with your re-rolls). That means, every time you can pull that off, your opponent will have to test with a -1 or -2 and take a deathroll! No, you don't win quickly, but it is hard to lose too.
- One of my frequent opponents complained that an army like the Mongol Conquest have too many superior and not enough dice. You end up taking too long and running out of time to win. To offset that, he prefers to use the LH to disrupt an opponent and then charges in with a slightly less expensive, Superior, Armoured Lancer Cavalry. You end up busting through that anchor more quickly and can then rapidly take advantage of the failed battleline. This (of course) means that you have to find a different steppe army (perhaps the Huns?)...
UK Tournament Results with this army
Useful Links
User-contributed links about this army:
- Mongol Conquest DBA Figure Gallery for this army - from Fanaticus
- Mongol Conquest DBA Figure Gallery for this army - from Fanaticus
- Mongol conquest DBA Figure Gallery for this army - from Fanaticus
- Mongol Conquest DBA Figure Gallery for this army - from Fanaticus
- Mongol Conquest DBA Figure Gallery for this army - from Fanaticus
- Mongol Conquest. DBA Figure Gallery for this army - from Fanaticus
- Mongols DBA Figure Gallery for this army - from Fanaticus
- Battle of Leignitz an overview
Allies
Put information on allied contingents here - including recommendations on which to use, and why.
Painting and Collecting the Army
- Paint schemes, insignia, shield designs? Put it here.
15mm Manufacturers supplying figures for this army
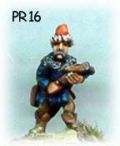
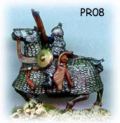
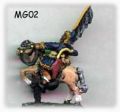
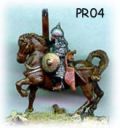
You can see some of the figures in the Ancients Photo Gallery also on this site. The Mongols had many subject troops, so look at the other Arab and East European ranges as well.
|
|
|
|
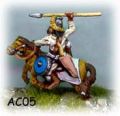
|
- Legio Heroica new range (as of 2010) of Mongol cavalry
- Essex Miniatures Ilkhanid Mongols in their Crusades range, 9 Mongols in their ancients range
- Donnington 30+ Mongol figures
- Gladiator Miniatures by Fighting 15's (Gladiator Games) 5 Ilkhanids in their Crusades range
- Old Glory 9 Mongols
- Museum Many Mongol and other figures
- Irregular Minis 13 Mongols in their Asian and Turk ranges
- Lancashire Games 5 Mongols in their Ancients ranges, some tatas in their Renaisance range
- Isarus (more former TTG figures) 19 Mongols
- Viking Forge Mongol range with 5 figures
- Brian Hall’s Hall of Ancient Warriors 6 Mongols
- Battle Line (NZ) former TTG Ranges, as above
- Outpost - Central Asian Turk range
- Khurasan - Many Central Asian types
- Legio heroica Turcomans in their Crusades Arab ranges, and a new Mongol range too
- Naismith & Roundway Turcomen in their Persian range
- Alain Touller Alain Touller, who sadly passed away in 2014. The ranges are no longer available, but included true 15mm figures from France - lots of variety in their "Peuples des steppes" range
Army Lists
Sample army lists for this army
Name of Army / Date
- Using asterisks inthe edit mode creates a bulleted list in the actual site
- This is a lot easier to do than easier than setting up tables
- For FoG I suggest listing your army in order or march
- with troop desctiptions on each line, for example
- 4 HF Armoured Average Drilled Impact Foot Swordsmen
- 8 LG Undrilled Unarmoured Poor Bowen
- Dont forget to include your Generals !!!
Include any notes you want here, including comments on how to use - or play against - the army.
Remember to leave a line before you copy the above section as a template for your own list
eBay Listings
UK Bookstore
