

Dark Ages at the Burton Doubles 2018
Samurai vs Samurai
Burton, home of beer and home of the sometimes-in-a-swimming-pool legendary Doubles event. This year L'Art de la Guerre had become the biggest period in the entire multi-ruleset event, and with a consistent them of armies from the early 1,000's across all of the doubles events the opportunity to deploy, for the first time, a Samurai army had risen to the top of the pile. And it was brand new, and I'd still not even taken delivery of it from Lurkio so what could possibly go wrong?
The lists for the Samurai and Samurai from this game, as well as all the other lists from the games at Burton_Doubles can be seen here in the L'Art de la Guerre Wiki.
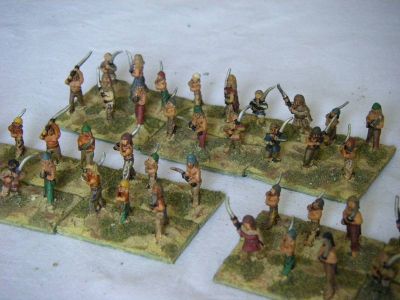
Samurai - the army that everyone ends up getting, and which presents the greatest painting challenge of all the Ancient & Renaissance armies. This was a challenge I took on by cheating - just by paying someone to do it for me. The army is online already.
What's Going on Here Then?

text
How well do these troops fight then?
 Troop type description
text
No chance of practice given that I didn't even take delivery of the figures until around 915 on the morning of the competition meant that the list had been put together with no real idea other than taking plenty of Elite Samurai warriors, and not going too big on the Heavy Foot swordsmen compared to the proper Medium Foot swords and bowmen. Whether that would work we would find out once they arrived.
With the army away being painted, all of my efforts had gone into the terrain- a table-narrowing waterway in the shape of a Samurai Castle wall made out of foamboard, and a village.

Luckily the army did arrive, and so the first game started - a Samurai Civil War in the historically-matched draw at Burton. I'm sure I've never started to deploy an army that I own, but have never seen, so this was very much a first. Both armies had set up in a similar way, with cavalry on the open flank and heavier foot in the centre - so perhaps skill would be massaged out of the game with identical troops facing each other?

 |
A Samurai village had grown up outside the castle walls, and soon the streets were bustling with Warrior Monks, window shopping for porcelain religious artifacts and unexciting hairstyles as the allied command moved up. Heavy infantry butted up against the edge of the town, and a herd of cattle lurked at the back waiting to be whipped into a frenzy by the over-excited and seemingly ninja-inspired invisible Japanese cattle herders. |

The enemy Samurai advanced cautiously forward, unsure of what might be hiding under the (borrowed from our opponents cattle-shaped) ambush marker we had placed at the edge of the town. Clearly not the default 1 Light Infantry, as the Samurai army cunningly lacked any of them in the list
Samurai Warfare

On the open flank the two lines of cavalry faced each other - the enemy extended their line to the flank with a screen of Emeshi Light Horse, and had slightly more proper cavalry than we did as well.
At this point in time we were considering if the way to balance this out in our favour might be to support the mounted wing with some infantry Samurai archery - a complex operation that would need much planning and practice, and as such was therefore entirely theoretical given we had never even held a single base of this army before 915 that same morning.

Switching swiftly - as you will see again no doubt - to a different filter in the image enhancing software, the now more tastefully lit Samurai cavalry prepared themselves for battle by admiring their armour and praying furiously that no-one would touch their sashimono's, which were somewhat delicate (note to self - Peter Pig Samurai are more robust, but a bit more tiny). Luckily, through some dint of good planning, the one unit of Average, medium cavalry (with the yellow banner - this is consistent throughout all of the reports so you can look out for it again) had managed to get itself on the end of the line where it was now taking shooting before anyone else. Doh!

Back to a harsher filter, and a drone-eye view of the two closing lines. Not much had happened since the last photo apart from the Medium Cavalry securing a lone hit on the enemy Emeshi (well, Hunnic if you ask me) Horsemen - a good start, but another chance to take photos of these newly painted figures from another angle.

The enemy withdrew their Light Horse through their battle lines, and then charged home. Instead of evading an enemy with wider frontage our Samurai decided to stand, marking the first time any of them had ever been in real close quarters combat.
Samurai Warfare

And, as has been the case throughout all of recorded history, the first on-table appearance in combat of very well painted troops quickly descends into an approximation of disaster as the Samurai horsemen pick up a slew of (admittedly very nicely painted) markers. This isn't quite a total disaster - the opposition have also suffered hits - but the hole that has been blasted through the left hand end of our line, allowing an enemy horseman to advance onto the flank of our formation does not look encouraging. At all.

The centre of the table is a veritable mutual appreciation society of Samurai pedestrians. Our Heavy Foot make up the centre of our line (imagination not being one of the Samurai strongpoints apparently) and the close formation expert swordsmen do apparently know a trick or to as well. They have cunningly shifted left and right, splitting their formation to provide a suitable gap for the herd or expendable stampeding cattle behind them to stampede through after they are whipped into an animal-welfare-friendly frenzy by their (note*) handlers.
(see how I avoided adding in a context-free instance of the word "inscrutable" there)

Our cavalry were coming off worst as the enemy massed greater numbers against us, but in a battle of two evenly matched armies that local superiority meant the enemy were outnumbered elsewhere - and "elsewhere" was in fact right here, next to the mounted wing.
Bringing their advanced analysis of mathematics to the fore, our Samurai realised that having 4 Bowmen and 2 warriors was likely to prove better than the 4 bowmen the enemy had stuck into the paddy field, and so the opening was on. In fact, it was sufficiently "on" to allow a spare bowman to be despatched to sneak round the back of the enemy cavalry over to the left.

Those bowmen were in fact sorely needed, as our line of Samurai Cavalry started to dissolve as the enemy rolled it up from the left and punched holes through its centre. The opposition had suffered some attrition, but in the aggregate attrition stakes we were very certainly winning overall. |
 |

Driven forward by our 28mm Dixon Miniatures commander, our Samurai Bowmen and Swordsmen charged home against a hail of archery - getting into the paddy field and into the enemy was very much the Japanese version of the modus operandi of these non-latin-speaking warriors, and that plan was given extra urgency by the undeniable fact that their mounted colleagues just to the left of shot were about to collapse, exposing these chaps flank to a mounted rollup.
Samurai Warfare

The once-proud and numerous mounted wing was now down to just a handful of bases of actual Cavalry as the enemy tore through our ranks. The arrival of the "spare" Samurai bowman had helped, but it all felt a little too little, and a little too late as the majority of our mounted force made its way shamefacedly, and for the first time, into the storage box in which they would live out the rest of their days in the service of the Madaxeman Shogunate.

Possibly inspired by a culturally specific and deeply cliche'ed folk memory, this 'backs to the wall' moment seemingly inspired our Cavalry to one last heroic effort. Or maybe the dice luck evened out a bit in our favour, who knows. But either way, suddenly we were looking at open space in front of our horsemen where once enemy fighters had milled and flailed. The tide hadn't quite turned here, but it was certainly ebbing a little.

With the left flank seemingly in the balance once again, attention turned back to the right where no-one seemed keen to get to grips with a near-identical enemy. Our tactic was very much to use the village as an anchor and try and compel the enemy to advance past it, potentially exposing their flanks to the colourful Warrior Monks in the process.
This was a good plan apart from one clear flaw - it was bleedingly obvious, and relied on our opponents walking into a trap they could plainly see. So, not much was happening apart from some desultory bowfire as the two sides sized each other up.

The left flank however was much more interesting, and getting even more so by the moment. The numerically inspired attack into the paddy field was now well underway, with both sides picking up markers as the deadly swordsmen hacked at each other at close range - unsurprisingly, our greater numbers were starting to pay dividends already. And heck, the figures do look nice don't they...? |
 |

The dice gods were now smiling on our Cavalry, or possibly the application of an Elite Bow Swordsman to the flank and rear of the enemy mounted formation was also helping too, but either way our horsemen were now starting to gain the upper hand - and, arguably more importantly, were shifting the locus of the battle further and further away from the centre of the table, so even if the enemy did come out on top they would have less time and opportunity to exploit their advantage.
With the enemy cavalry consumed with their frontal opponents, our Foot Bowmen were able to help surround the enemy (embedded) general and pull him from his horse to his doom!

Moo! The Cows go in as the enemy brace for impact.
L'Art de la Guerre hint - Expendables, which usually means "Scythed Chariots", fight the first round at a dice-tastic zero-zero against almost all opponents in ADLG. In the first round their opponents also can't claim flank advantages, making using these one-shot weapons into an amusing lottery. They have Furious Charge, but only have one cohesion point, so they tend to win big or die quickly
Samurai Combat

The Battle of the Paddy Field was hotting up - the enemy were feeding more and more units into the melee, but with the second-string Ashigaru being of Mediocre quality there was every chance that all they would achieve would be to reinforce defeat rather than tip the balance back in their favour. Our Samurai had taken casualties as well, with 2 of them on 2 hits (out of 3) but overall the upper hand appeared still to be ours in this pivotal part of the table.

Well, maybe not. Weight of numbers certainly does have a quality of its own in ADLG... |
 |

With the beef on the hoof based attack having failed to make any sort of sensible dent in the enemy centre it was finally time for the two lines of proper battle troops to get to grips with each other. A mighty and divine wind whistled across the battlefield as the Samurai charged forward to death or glory, or both...

The chaps in the paddy field had presumably decided that the "death" bit was what they had been looking to achieve today though as they reeled under the weight of waves and waves of enemy troops. In the distance our own Ashigaru looked on and pondered whether in future battles the idea of leaving 6 (admittedly Mediocre) units to just stand around and act like army padding was going to prove to be a repeatable tactic.

The battle in the centre was looking scary as well, with the space where once there had been cows now appearing to be rather unfortunately exposed - luckily the enemy only had slow-moving Heavy Foot facing it, and we were coming off significantly better in the HF on HF component of the battle as well, inflicting great damage and standing firm ourselves.
L'Art de la Guerre hint - both of these lines of Heavy Foot are armed with 2HCW, making this a brutal and deadly combat. When HF win a combat they add +1 to their dice score, which has the overall result of triggering an additional hit on the enemy 50% of the times they win.

Amazingly, we appeared to have learnt something during the game and managed to put it into action almost immediately! |
 |
With the enemy's lesser quality Cavalry getting stuck in melee after attempting unsuccessfully to ride down a line of our Samurai bowmen, some of the Mediocre Ashigaru Spearmen had moved up into an unopposed flanking position, ready to swing into the flank of the enemy cavalry line in their next turn! |

The line of scrimmage had now spread like a sword-borne contagion along the full frontage of both armies, even spilling into the suburbs of the village where our Monks were clashing with enemy samurai bowmen amongst the houses and cherry trees. The sides were mostly evenly matched, with our greater number of 2HCW men offsetting the enemy's higher quality sword-armed bowmen, so the result was very much up in the air...
Samurai Swords

This whole "learning mid-game and changing your tactics" stuff was contagious - our emboldened Ashigaru were steaming forward all across the field, slamming into the battle-worn and as yet unreformed enemy in the paddy field with devastating effect.
With the enemy Cavalry wing now also dramatically enfeebled by the loss of its General, our depleted left wing mounted force was now also confident enough to send back a now-spare Cavalryman to join in the envelopment, turning the tables on the enemy in a most satisfactory way.

Ashigaru in the flank! And, with the Samurai Bowmen teetering on the 2-hits-down brink of defeat as well, not a moment too soon!
The enemy army collapses, as with both sides having taken near-equal losses the death of the enemy Cavalry-mounted General makes all the difference as the opposition reach their break point before we do - a first win for an army that was not even in our possession a mere few hours before!
Click here for the report of the next game in this competition, or read on for the post match summaries from the Generals involved, as well as another episode of legendary expert analysis from Hannibal
Post Match Summary from the Samurai Commander
 Clearly painting quality is a great guide to troop quality when it comes to having other people do you hard work for you, and in this Samurai army I appear to have discovered a band of brave warriors who can act under their own initiative and take the battle to the enemy with success and style - a stunning combination.
My decision to delay combat on the right wing proved to be very much the correct one, and in this ADLG world the pacing of an overall battle is indeed a great skill which I appear to have comprehensively mastered. By waiting until my army had the upper hand on the left side of the battlefield and then lurching forward into a mutually destructive exchange of casulaties on the right I was able to bring the game to a positive conclusion with a net win to me.
The complexities of tactics in the classical Japanese manuals are a mere starting point for one as clever as me. Deploying Heavy Foot in the open ground in the centre, and positioning all my mounted troops on the only open flank on the table whilst putting loose formation infantry into all of the bits of terrain available shows a genius few could hope to match.
I will now reture to my Dojo and compose a Haiku to my own greatness, as I prepare for the next battle.
Hannibal's Post Match Analysis
 Methinks that you overestimate your prowess, and if your intelligence truly matches your mathematical analytical skills there will be some torrid times coming in later rounds my sashimi-munching friend.
A more balanced and pragmatic analysis of what happened here is that two near-identical armies went toe to toe and exchanged casulaties almost exactly in lock-step right up until the point at which one of them fell over first. This is not really redolent of skill - even on the dice front you failed to do any different to your opponent.
The real, tangible differences seem to be that you killed an unwisely embedded (and committed) General who exposed himself to risk through a moment of either madness or good fortune on your part - his loss, and the accompanying 3 points of attrition, were the only difference between the two armies in the final tallying of the bodies left on the field of battle.
This then was the narrowest of possible margins of victory, and your performance showed no skill at all in securing an equal exchange of losses with identical forces. Perhaps the asymetrical opponents you will face in the next game will tax your brain to bursting pont?
Click here for the report of the next game in this competition
You may also like....
View My Stats for My Match Reports Pages